Monday, April 16, 2012

Wednesday April 11: First Edits

Now that we've got our footage, it's time to ingest it onto the computers and start editing.

1) The first step is to get it onto the computer.  To do this we'll need:
-Camera
-Tape w/ footage
-Firewire transfer cable


-Computer with Final Cut

(if you're shooting on a camera that uses digital files instead of tapes, you simply need to copy the files over.  You may need to transcode the files into a format that Final Cut can work with).

2) Turn your camera on to 'Play' or 'VCR' mode, and rewind your footage to the beginning.

3) Hook the firewire cable to the camera and the computer.

4) Open up Final Cut Pro

Once Final Cut is open, you'll need to make sure it can communicate with the camera and capture the footage in the proper format.

Once final cut is open go to Final Cut Pro > Audio/Video Settings...


Cameras shoot in a variety of different formats depending on how the information is recorded.  The list of different formats can be overwhelming - but don't worry, it's not actually that complicated and you can always look up the settings for your camera.

For the camera we used, we shot in a format known as High Definition Video, or HDV.  This means that we shot in full HD (1920 x 1080).  We also used a frame rate of 24 frames/second.  So, we need to find the settings that match that:

For my sequence preset I used HDV - 1080p24.  HDV is the format.  1080 is the resolution (size) of the image.  and the p24 is because I shot at 24 frames/second.

For my capture preset I can just tell it HDV and it will figure out the rest.

For my Device Control I'm saying use HDV and Firewire - so the computer will know to look for an HDV camera over a firewire connection.  This will allow me to control the camera's playback using Final Cut.

Now, just say 'OK'


The next thing we need to do is make sure we know where it's going to save all of our footage.  When I capture footage from a tape onto my computer using Final Cut, it creates a digital Quicktime movie file.  These are automatically stored in my 'scratch disk' - which is simply a folder somewhere on my computer.  I can tell Final Cut exactly what folder to use by going to Final Cut Pro > System settings:

Now I just navigate to my folder and everything I do will be saved there.

It's important to make sure these settings are the same every time you open Final Cut, or you may end up accidentally saving your files to someone else's folder.

Now you're ready to capture!  Go to File>Log and Capture...

The Capture window will open and you should be able to control the camera to watch your footage.  When you're ready to capture it, just hit the 'Now' button.

It will start saving your files onto your scratch disk location.  The clips will appear in your browser window in Final Cut.

Monday April 9: Shooting day!

Great work by everybody getting to our location on time, staying organized, and rounding up tons of people to interview.  It seemed like everyone had a good time and got what they needed - now it's just a matter of making sure that it looks/sounds okay and manages to give you what you need for each project moving forward.

Here are some images from today's shoot:


Monday, April 2, 2012

Monday March 19 - Monday April 2nd: Project Planning

Now is the time where we work on developing out our class projects!  You've each established some initial ideas, and over the next couple of weeks we'll develop out the details of what you need to get, what you're going for aesthetically, and making sure the concepts you're working with are strong enough to get us through the next month.

I'll be keeping track of how everything shapes up.

Alma: Working on an idea having to do with 'The Hustle' and what people do for money/the role money plays on individuals, society, and the choices the people in her life make.

Allou and Elisa: Working on an idea contrasting people's traditional ideas of homelessness with Elisa's own experiences as a youth who lives in transitional housing.

Tammy, Buffy, and Melissa: Working to create a piece about San Francisco - playing with how the city is perceived by tourism and how they as residents perceive it.

Sarah, Jacque, Hanin, Karina: Working on an idea to deal with the influence of media on women - initial ideas dealing with who young girls look to as role-models, and what those role-models are actually presenting themselves as.

DEVELOPING:

Alma: Staying with her initial idea, looking to do a combination of interviews (more staged) and street footage.  She'll be taking the camera to some sites she already knows of as soon as today (3/28).  She'll start capturing footage this weekend and keep the camera through next week.

Allou and Elisa: Looking to get street interviews of people's perceptions of homelessness, and also shoot a more stylized/narrative portrait of a day in Elisa's life.  Will compare the interview answers/audio with the footage of her daily life and reveal at the end that she is in fact homeless.

Tourism group: They would like to each have an individual section to film their own footage of SF and edit their own little portrait of their own experience.  They will also take the SF tourbus tour, and capture footage that they may use in contrast to the footage they create.

Women in Media: Still need to develop the final details, now looking to grab street interviews at Powell street between men and women and who represents them in media.


Monday, March 19, 2012

Monday, March 19th: Language of Editing and Project Selection

As we narrow in on our final project ideas, it's important to remember that as important as the technical skills we've learned are, nothing is more important than the meaning, emotion, and intention behind your choices as an artist.

We've discussed these ideas a lot - especially in the context of the story ideas and how we shoot those ideas.  Of equal importance is the way we move through our choices in the edit.  The edit is where the choices we've made all along become real - and the edit has the power to really improve the story, or to ruin it completely.

The editor's job is to use the words and images that have been created previously and use the cuts to convey the emotional impact that the director has been seeking all along.  In pre-production there is a very specific relationship between the writer and then the director.  In production, the DP works to help realize the director's vision as it pertains to shots, movement, and lighting.  And in post, it is the job of the editor to make everything work in harmony to actually sew it all into something tangible.  Before the editor there is literally just a pile of choices - after the edit there is a movie.

Let's look at some scenes from 'The Cutting Edge' and discuss:


Think as well about how this influences documentary.  Let's look at some BAVC student work that emphasizes the edit choice.

Think about the role not only of the image but of sound.  Some of the worst documentaries are too focused on talking heads footage - yet sometimes cutting to the person who is speaking is the most effective choice.  Think about the power of the edit as you look at work and also as you plan your own.

Speaking of planning your own!  We have a TON of wonderful project ideas that came out of last week's brainstorm, but we have to select what we can actually pull off.  So, here's where we've landed:


Wednesday, March 14, 2012

Wednesday, March 14th - Project Brainstorm and Pitches

At this point, we've dipped into each of the main areas of filmmaking.  We've talked about taking an initial idea and using various tools to develop that into a story, and if it's a narrative, write a script.  We've talked about the process of planning through organizing your equipment and people, your visual ideas: shot lists and storyboards, and if you're working in documentary spending time with your subject and finding the most compelling angles.

We've overviewed the basics of production, from camera operation to sound and lighting.  You should know how to plan and execute shots, thinking consciously about what effect different angles, focus, and movement will have on your final product.  We've talked sound capture and sound design, as well as lighting technique and set up.

And we've dipped into editing in Final Cut.  Taking that footage and ingesting it into the computer, labeling, organizing, and laying down a cut.  And most importantly you all have been exemplary in your exploration of conscious storytelling and critical thinking about portrayals of subject/character, story, and the ways in which all of these technical tools influence a viewers experience.

Now it's time to put all of this into action.  Spend today brainstorming things that are important to you, stories that are interesting, and considering what is realistic as a first project.  Remember, we're keeping things pretty short (5-7 min) and we'll be moving pretty quickly.  I'm not expecting an epic feature film, in fact, I'm not even considering that.  Rather, see what you can do simply that will be even more powerful.

Some ideas:

1). Prepare a pitch for a project that tells a story very personal to you.  This could be a biographical kind of story about your own life or the life of someone close to you.

2). Prepare a pitch for a project that tells a story important to your community.  This could be an issue you care about, an organization you respect, or an individual who's life you admire.

3). Prepare a pitch for something that pushes back against mainstream media tactics.  This could be a fake-commercial that mocks advertising techniques, or a short PSA that addresses issues you think are relevant (portrayals of women/girls, violence, etc.)

4). Something else entirely your own...

Monday, March 12, 2012

Monday, March 12: Documentary Interview Technique

As we shift our focus towards final project for the class, one thing that will be a very important tool in your filmmaking arsenal is a solid understanding of how to conduct and shoot an interview.  Many of you could incorporate personal stories in this or future projects, and there are a lot of different techniques that can get you the footage and narrative you need.

Some of this might be second nature to you, and some of it is a little tricky to remember.  We've all seen countless examples of interviews in the media we've grown up with.  Sometimes it's very direct, like a talking head on a screen, and other times it's embedded within a more complex set of visuals.  Pay attention to interviews you think are effective, which ones do you trust?  Which ones are you skeptical of?  What is the style of the interview contributing emotionally to the story?

I want to take a look at a video that's blown up and stirred a lot of controversy in the past week or so.  It's a documentary of sorts - but it's also an amazing demonstration of social media, and some very interesting techniques that are specific to our current time and place:


The Kony 2012 Video has a ton to discuss.  My main questions for you are: Do you trust the filmmaker?  Why or why not?  What techniques are being used here?  What do you want to do next, after watching this piece?

Discussion about this is a great jumping off point for the rest of our day, and moving forward thinking about your projects for the class.

Now, let's break it down in terms of thinking about it in your own work.  Like everything else in your project, the key to a great interview starts long before the camera is actually rolling, and doesn't end until you've locked in your edit.  Every step along the way contributes to the quality and message your interview will ultimately have on your viewing audience.

During the process of pre-production, or whatever time you have prior to your interview there are a few key things you need to determine for yourself.

The first is obvious, and comes with any project - what is my topic?  And more specifically, what is my focus?  With documentary each of these will be subject to change, but you need to have something compelling to go on.

It's always ideal to spend some time with your subjects and your topic without a camera.  If you're doing a piece about the circus, ideally you get to hang out at the circus a bit without a camera and get to know the characters, the stories, the sights and sounds.  As you do this, you'll find that something more specific starts to develop - rather than being just about the circus, perhaps it's about the treatment of the animals, the history of the freak show, the traveling lifestyle, one specific clown -- there's about a million different movies within that topic.


As you start researching and spending time with your topic, you'll probably find that your focus narrows.


As these ideas form, start thinking about your interview subjects - who is the most interesting and compelling?  Who can do the most to help you tell your story?  Who has an interesting perspective or anecdote?  Don't choose the most charismatic person if they have nothing to add to your piece.

Start thinking about your own role as a filmmaker and interviewer?  How are you going to let the audience know that they can trust you?  What is your involvement in the piece itself?  Are you going to let them know why you're interested in this subject -- or are you going to keep your presence behind the camera?  These are all very important questions to answer.

Someone like Michael Moore embeds himself within his work

Or Morgan Spurlock, who is the filmmaker and the subject.

Ken Burns doesn't appear at all in his work, and his influence is in the stylistic choices of the camera and edit.


As you start to lock down some of these bigger choices, and deciding who your interview subjects will be and what your own role as a filmmaker/interviewer is, it's a great idea to conduct pre-interviews.  These are broad overviews of the subject matter that give both you and the interviewee the opportunity to prepare for the on-camera interview.  You can do this in-person, over the phone, even through e mail.  These questions may or may not be used in the actual interview, but most importantly they serve as a way to get some basic stuff out of the way early, and prepare both you and the subject for your respective interview styles.  You can also use their answers to inform further questions that you'll use in the interview.

Now that you're ready to conduct the interview on camera, there are a few things to consider.

If you're the director as well as the interviewer, you have a lot to keep track of.  Decide early on some of these factors so that you can keep yourself focused on the interview itself:

The Environment: Think about what the best environment for your interview is?  Do you want it to be something formal, like a studio?  Do you want to put it in context (i.e. backstage at the circus?)?  Where will your subject be most likely to give you the content you're after?


(Also consider the effect the environment will have on your sound!)

Framing: Is the interviewee going to be looking at you, or right at the camera?  Are you going to be seen at all?  Why?


Sound: What kind of microphone are you using?  Lavalieres are often smart for interviews, but they can be a little more set up and carry issues of their own.

Providing basic comforts: How can you keep your subject comfortable?  Consider where they are, have water on hand, and if necessary make sure you've provided proper food.  Think about your lights and microphones, and the placement of additional equipment and the camera -- it can add up to be kind of intimidating, so how can you best set up for your subject and interview?

Once you're all set up and ready to conduct the interview itself, here are some important tips to remember:


  • It's okay to give explanations and directions:
    • It can be a great idea to give your subject an idea of how you're going to proceed.  Let them know if you might interrupt them, or move subject areas.  It's perfectly acceptable to ask a subject to repeat something they've said, or to re-word it in a shorter sentence, etc.
  • Have them put the question in the answer - especially if you are going to cut out the interviewer.
    • Make sure your subject knows to repeat your question in their answer.  For example, if you say "what is your name?" they should say, "My name is Beth" rather than just, "Beth."
  • Finding your genuine self/empathy:
    • Be real.  Be relaxed - you need to be the one in control during the interview.  The best way to do this is to let your subject know that you care about what they're saying.  Even if they're moving off topic, be polite in re-guiding them.  If you anticipate navigating into difficult topics, be ready to respond accordingly.
  • Structure your interview:
    • As you think about the order of your questions, it's usually a good idea to start with the easy stuff and progress to more in-depth things.  Start with the super basics, then maybe move on to things you've covered in the pre-interview.  Then start moving in new directions and ask any tough questions.  Think about starting with factual material and then moving on to anything subjective.
  • Phrase your questions to avoid yes/no or simple answers.  
    • Don't put too much in the question if you want the subject to give you a genuine answer.  Rather than "Was that difficult for you?" say "How did that make you feel." etc.
  • Be ready to blend between planned and spontaneous questions:
    • You should always come in with a strong list of planned questions.  But don't be so rigid that you don't follow promising answers with important follow up questions - if something seems relevant to your topic, ask more about it.  Similarly, don't just wander down every tangent your subject may go on, use your planned questions to get things back on track where you want them.
Your behaviors:


Post Production:

Thursday, March 8, 2012

Monday, March 5: Concepts of Lighting for Cinema

So far we've covered a lot of really important elements of filmmaking, from idea through execution and even piecing the product together in editing.  You should feel comfortable with the basic flow of taking a concept for a movie and making it a reality through planning, shooting, and cutting it.

However, there is one area that we haven't really gotten hands-on with, an area that will drastically improve the quality and value of your work in cinema - and which will allow you to use your camera to it's fullest potential as well as add a whole new creative level that can shape your story.

That area is lighting.

Just by the nature of the work, you've already dealt with lighting in one way or another.  A lot of you commented on the quality of lighting in your footage during the scavenger hunts, particularly in stuff that you shot outdoors.  The sun is our most natural and greatest light source - and it is a huge asset to our filmmaking ability.  However, there are a number of other tools that can work to create amazing lighting effects and set ups as well -- including ones that help you take more control over how you use the natural light available to you.

The big concepts:  Cameras are not nearly as nimble or sophisticated as our own eyes and brains.  As a result, if we want to create a look for our movie that looks appropriate to our eyes, we have to do a little extra work.  The difference between a well-lit scene and an unlit scene can look something like this:


And that's just using a single additional light!  When you really start to use a few lights and think about the way they blend together you can achieve control with amazing results.  

There are a number of factors that affect the light intensity, shape, color, and the effects it creates.  This has to do with what you have available in your set of lighting tools.  Let's take a look at some common options:

Type of light:
The type of light you use will affect how powerful it is and how the light is cast in terms of shape and color.  For video, you have a number of different options.

Practical lights - these are lights that appear within your scene.  Usually these are things like table lamps.  You can also think of them as the things you have available to you for use in instances where you don't have access to a professional lighting kit.  Things like lamps, globe-light/chinese lanterns, and any built in lights can go a long ways towards boosting your image.


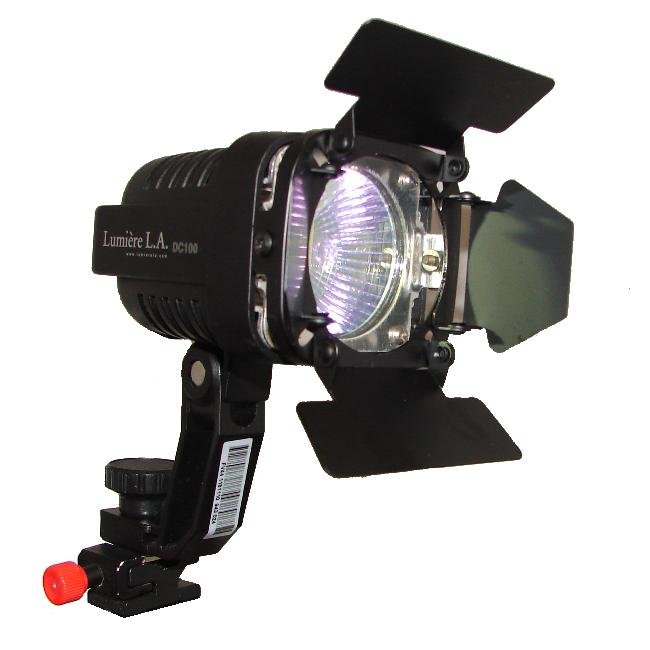
Tungsten video lights: There are a lot of different types of lights that are designed specifically for use with video and/or film.  There are two main types of color temperatures in video: tungsten and daylight.  Tungsten is at a specific color temperature that casts more of an orange-yellow light, similar to what you might find in indoor lighting with regular household bulbs.


These video lights can output quite a bit of light, and in some cases can be quite harsh.  Depending on the type of bulbs they can also get very hot, and you have to be pretty careful about how you handle them.


Daylight video lights: Some video lights are daylight balanced.  We don't perceive it easily with our eyes, but the color temperature of natural daylight is significantly more blue than a lot of light that comes from the bulbs we use.  As a result, special daylight-balanced film lights have been created for use in film and video.  When you use these they match with the light being cast by the sun - so they're great for use outdoors.  You can also use them to create the appearance of daylight - such as light coming through a window on a set where there is actually no exterior light.


If you have access to a tungsten light, but need to create a daylight effect you can put a blue gel in front of the light.  Similarly, if you have a daylight balanced light and need a tungsten color effect, you can use an orange gel.  Gels are transparent pieces of thin plastic that can handle high temperature exposure, and are used all the time in creative lighting:

Lighting gels and the effect they can have 

The shape of your light can be affected by a number of different factors.  Some lights are very harsh, and others are quite soft.  Softer lights are nice for creating a more even spread of light and more harsh lights can be very effective in creating dramatic and highly contrasted looks.  If you have a naturally soft light, you can try to shape it into something more directed for dramatic effect, and if you have a naturally harsh light you can try to soften it up.

Below are some common light types for film video.  These are professional and semi-professional lights, but please bare in mind that any light help to will provide you with the opportunity to illuminate your scene and be creative with what you want:

Incandescent lighting - this is the same concept as used in a household bulb - but in film/video lights the bulbs are usually much much more powerful and create a mush more intense light cast. Depending on the type of bulb, these can be relatively energy efficient or require a decent amount of power.


HMI lighting - Usually, these are also capable of very strong output.  They can also run pretty hot to the touch and can heat up a set.


Fluorescent lights - florescent lights like those used in offices can cast a very even, soft light. However, they are not ideal for use in film because they tend to appear with a flicker and cast a sort of green color.


Kino Flo lights - this is a light very similar to traditional fluorescents, but are made to be used in video.  They resolve a lot of the issues that traditional fluorescents have, run quite cool and are relatively energy efficient.  They are also available as daylight balanced.


LED lights - LED is a newer technology that is being used more and more for film/video.  They are very energy efficient, they are quite soft and even in their cast, and are usually pretty light and easy to set up.  Some of them have color issues where they appear sort of green, but high quality ones are available in daylight, tungsten, or adjustable color temperatures.


Lighting set ups:

There are a lot of different ways to think about setting up your lights for a given scene depending on the style and set up of your location.  But for a good general starting place, the fundamental lighting set up to know and learn is called 3-point-lighting.  Using this concept you will be able to create a dynamic scene that emphasizes your subject and lights them evenly without being distracting.

This concept requires three different lights.  The Key Light, the Fill Light, and the Back Light.  Let's look a little closer at each and what purpose it serves.


The Key Light is just the term for whatever light you use to first emphasize your subject.  Usually you want to use a light that can really push on one side of their face in a pretty targeted way - it's the brightest in the set up.  A good place to first set up the key light is at about a 45 degree angle from where you have your camera.

The Fill Light is placed somewhere around mirror image of the key light.  The fill is usually softer and less intense than the key, and serves to balance the shadows being cast by the key.

The Back/Rim/Hair Light is placed behind the subject, pointed at them.  It serves to illuminate the hair and maybe the subject's shoulder from behind, essentially providing the scene with depth and pushing the subject off of the background.

Here's an idea of how each light serves the scene:
You can be creative with exactly how you achieve these effects, but that is the idea behind 3-point lighting -- the most important thing to think about is what you're trying to achieve in your scene and how you might use different light sources to achieve context and emotion.  Do you want your lighting to look very natural?  More dramatic?  Colorful?

Remember, even to make lighting appear natural on film/video takes a lot of work - you can just use what's there because cameras are not as dynamic as our eyes.  We have to help them achieve the illusion of a natural appearance.

Here's a great example of how lighting can be an important character in your scene:

Once we reviewed these concepts in class, the students went to work creating some set ups of their own.  We had a traditional HMI 3-light-kit that used tungsten halogen bulbs, we had an LED light kit that was daylight balanced, and we also had the whole light grid in BAVC's MPR which is mostly outfitted with daylight balanced Kino-Flo fixtures.

Here's some stills off of the monitor that shows what you came up with:

 Before the video lights are on - using only what's in the room AKA work-lights

The Key Light only

 Full 3-point-lighting set up using our tungsten kit
 
  
A softer look using the light grid (Kino-Flo lights) and LED lighting

 The set up for the above look

  Using high-key lighting to try and create a noir-style look in black and white


Wednesday, February 29, 2012

Monday, Feb 27 - Concepts of Editing in FCP

It's post-Oscars Monday!  And let's hope this class is less disappointing than the bland awards show.  There's plenty to pick apart in terms of the Hollywood showcase, and it's a good lead in discussion to Wednesday's class.  For now, I'll share this with you:  The voting group that makes up 'The Academy' is comprised of over 70% men and less than 10% people of color.  The vast majority of them are over 50 years old, with most of those actually older than 60.  Ugh.


Moving on... Today we're going to continue our look at Final Cut Pro and dive in a bit more to look at editing concepts.  Last week we got as far as a simple layout of our simple seen - we managed to shoot and rough edit the piece in just one class which is great, but there's a few things we probably rushed and a few other things left to do.  Let's start by revisiting our cut and seeing where we can improve some of the edits:


Okay, so it mostly works as a sequence, but there's a number of things that really need to be improved.  The beginning shots probably linger a little long, some of the cuts feel a little abrupt, we have a continuity error in terms of her movement, and the sound is a sad mess.  Let's start by refining the cuts a little bit - now, we ran into an issue where one of our key shots doesn't quite match the action of the rest of the scene, so we either have to fake it with what we've got, see if we can change the shots a bit, or try to reshoot the scene.  Let's say we can't reshoot, so we have to fix it in the edit -- you guys can try that in a bit, but for now, let's try to mask it just with the help of sound.

While I'm at it, I'll go ahead and fill in sound for the entire scene.  For now I'll just rely on what's quickly available to me using Final Cut and Apple sound libraries as well as what we captured on set.  If this was an important project, I would go out in to the field and do some of my own recording too.  We'll also slow down our bottle-drop shot as you all suggested for dramatic effect and add some reverberating booms to the hits on the floor.

Notice how with just a few simple sound additions the piece starts to take on a whole new polish - it really enhances how full the scene really appears to be:


The final step would be to go in and make any final adjustments, especially with a focus on image and color.  I could throw a title on the beginning and credits on the end using the text tool - and boom, I've got a complete little sequence.

To add a title/text in Final Cut:


And that, my friends, represents what is essentially the basic workflow for post-production editing.  This was a little bit slap-dashed considering we shot it and laid down a rough edit in just about 2 hours, but you get the idea!  Let's review:

1). Start by importing and organizing/labeling your footage.  This is also your first opportunity of post-production to review your footage to determine good takes and moments, and to get a feel for how different things will cut together.

2). Once you've determined what clips you'd like to use, start marking your moments using IN and OUT points in the viewer window and laying the footage onto the timeline.

3). Build out your sequence.  As you go through you may make small adjustments.  Once you've made it through this process you have what is called your 'rough cut'.  You can now determine what you still need to address.

4). Start refining your cut by addressing problem spots, cutting out unnecessarily material, awkward cuts, working on transitions, etc.

5). Once you're happy with the general layout and pace, you can start to work more directly on sound.  Do several passes to smooth out sound, add sound, work with music, etc.

6). Once you're done with sound, you can go through and do a pass focusing on the image, boosting the quality or giving it the look you want as well as making sure colors and lighting generally match from shot to shot. *

*If your film requires special effects you will likely incorporate the effects footage to some extent throughout the post production process, but it will become most intense towards the end when the edit is more or less locked in.

Some important tools in the process of using Final Cut:

1).  Your arrow tool and your razor-blade tool.  You arrow tool is the default tool that you control with your mouse.  Use it to grab things, select things, move things, etc.  The razor blade tool becomes useful for when you want to trim a clip on the timeline - it acts like a slice in your footage to break a clip into sections.  You can select the tools from the tools window, or you can use your keyboard quick-keys:
a = arrow tool
b = blade tool


2). Cross-fades, volume adjustment, and other transitions.  To add a fade to either your image or your audio you just right-click and add a crossfade to the front of your clip or the intersection of two clips.  To manually adjust audio volume you simply turn on the clip overlays (in the bottom right corner of the timeline window) and then adjust the pink volume line that appears on your audio track:

3). Snapping and linking.  The snapping and linking tools are meant to help you efficiently manipulate the footage on the timeline.  When you turn snapping ON (upper right corner of the timeline), it makes the footage in the timeline act magnetized.  When two clips are placed close together they *snap* together.  This is great, except for when you're trying to carefully time an event out and you don't want the clips to jump together - then you would turn snapping OFF:


Linking allows you to control the video track and the audio tracks that are associated with that video.  If linking is ON, it will select both video and audio tracks.  If linking is OFF, you can isolate video or audio tracks:


More about quick-keys: Quick keys (sometimes called hot-keys, keystrokes, or keyboard shortcuts) are awesome.  For most every tool and task in a piece of software, especially professional software like Final Cut Pro, there is a keyboard shortcut that allows you to accomplish the same thing by simply pressing a key or combination of keys.  For example, instead of using the razor blade tool to place a slice in one of my clips, I can simply press "control" + "v" and it will make a slice wherever my playhead is placed:


You can learn the quick key combinations by looking at them in the menus where you are going to do the selected task, or by hovering your mouse over the tool.


The quick-key to render is "command" + "r"      and the quick-key to turn on/off snapping is simply "n"

But for a quick guide, here's a list of great and useful quick keys to use in Final Cut Pro:
By the end of class you all had some great edits of your own versions of our little scene!  Everyone really took off with Final Cut.  I was impressed by the variety of choices - some of you really were able to use the shot of Karina's eyes to make her much more of a character.  Others of you totally changed the tone of the scene by re-arranging just a few shots.  And at least one of you completely solved our continuity problem!!

Elisa's edit, where the embarrassment revolves around her speaking rather than just dropping the bottle:


Allou's edit - totally fixed our continuity error:


Wednesday, February 26th- Women's Media Literacy

Today we’ll be looking at Media Literacy from a woman’s perspective. As we begin to define what makes media positive or damaging, the students will view videos that use a variety of methods to address the issue of sexism.


*10 Cliches Framed in Comedy
 We’ll begin the discussion by showing a clip from Parks and Recreation, during which Amy Poehler’s character, Leslie Knope, takes the blame for shooting Ron Swanson. Although this clip is from a comedy show, Poehler’s character plays into a variety of very real clichés about women.


*The “Shared Experience” and Artistic Accountability
Let’s begin to think of media literacy as a filter that can be applied to the media you consume and create. Whether watching television, out at the movies, or reading a magazine we are constantly being bombarded by stereotypes of what women should be.

Author, feminist and social activist, Bell Hooks, describes movies as providing “a shared experience, a common starting point from which diverse audiences can dialogue about these charged issues.”

In her writings, Hooks brings up the idea of artistic accountability, meaning that artists are responsible for the views portrayed in their work. According to Hooks, “Thinking in a constructive way about accountability never diminishes artistic integrity or artistic vision, it strengthens and enhances it.”

*The Bechdel Test
The Bechdel Test is an uncomplicated test to determine if there’s gender bias in a film. Although it appeared in a 1985 comic strip, few Hollywood features pass this test. In the comic, one of the characters says she only watches movies if it satisfies the following requirements:

1. It has to have at least two women with names
2. Who talk to each other
3. About something other than a man

This video looks at the 2012 Oscar nominees and where they stand with the Bechdel test 
(screening from 01:06- 4:47)


Additionally, here’s a list of 10 Famous Films That Surprisingly Fail the Bechdel Test:


*War Zone
The film War Zone, by Maggie Hadleigh West, shows what it's like to be a woman on the street in a cultural environment that does little to discourage the heckling, following, touching or disparaging of women in public places.


As a class, discuss the students’ reaction to the film. Was her filmmaking method effective in showing a woman’s perspective? What shocked you? What creative choices did you like? What changes would you make (if any)?

*Beyond Beats and Rhymes
Director Byron Hurt created the documentary Hip Hop- Beyond Beats and Rhymes to look at the negative ideology portrayed in mainstream hip hop. Not only does the documentary look at how women are objectified, it also explores the complex idea of masculinity.


*The Future
(15:25)
 Filmmaker, author, and performance artist, Miranda July, takes a comedic approach to dealing with the influence of the media in her film, the Future. Sophie, a character played by Miranda July, decides to quite her unfulfilling job and follow her dream of being a dancer by releasing a video series called 30 Days, 30 Dances.


Afterward, discuss the class reaction to the clip. Has Miranda July incorporated the pressures of society into her film? Does it seem realistic?

Shut Up and Sing
(38:07)
Barbara Kopple and Cecilia Peck’s documentary, Shut Up and Sing, looks at the Dixie Chicks’ career following an anti-George W. Bush statement at a 2003 concert. Both the subjects and filmmakers in this documentary faced creative choices regarding the portrayal of women.


The Dixie Chicks were propositioned by a number of documentary filmmakers, including Michael Moore, but decided to have female filmmakers Kopple and Peck share their story. Rather than having a narrator or text explain the events in the movie, the filmmakers decided to let the women speak for themselves.

After watching the clip, discuss class reactions. What choices did the filmmakers make? What emotions did that evoke? Do you think the Dixie Chicks would have received a different media reaction if they were the Dixie Dudes?

Additional Sources of Inspiration:

-Here's a blog dedicated entirely to bashing sexist advertisements:
http://sexistads.tumblr.com/


-This is an editorial photo shoot that had a skinny model and a “plus size” model pose in the same clothing:


- Here's a fascinating TED talk led by author Chimamanda Adichie. She tells several stories that explain the danger in telling only one side of a person or community's story:


Wednesday, February 22, 2012

Wednesday, Feb 22 - Group shoot and sound edit

At the end of last week we did a breakdown of this simple script so that we could shoot it, in particular we had an emphasis on sound design and sound effects.  Today, we'll shoot the scene.

First, let's review what we came up with, here is the script:

If you recall from last class, we did a bit of a breakdown within our screenwriting software, Celtx (available for free - download at www.celtx.com).  That's why some of the words above appear in various colors.  Each color represents a different department (Classroom in yellow = location, Students and Student 1 in red = casting - extras and primary, etc.)  To do this you go to the 'breakdown' tab in Celtx and highlight your need, then add it to the appropriate department.  Celtx keeps track of what you need for each scene:


This is a great way to start keeping track of needs.  We also created a shot-list as a group.  I wrote it on our little whiteboard with my pretty terrible handwriting.  It looked like this:

Now, that's essentially what we need to begin our shoot, but it's always a good idea to organize this information for maximum efficiency.  Let's start by cleaning up that shot-list:

Something easy to read, easy to share, and easy to edit is always a good idea for something like a shot-list, so I recommend making them as electronic documents.  As we can see, we have 13 shots planned, that's plenty of coverage for such a short scene, but it's not uncommon to have so many shots.  Remember, if it isn't perfect the first time (and it rarely is), we'll have to do multiple takes of many of these.  This is why shooting movies takes such a long time and the workdays can last 12-16 hours.  
Notice that shots are only listed once, even though when we edit them the same shot will appear during different moments in the scene (Medium Close Up on Student 1, for example).

The cinematographer and camera department often also utilize storyboards and floor plans, so they're even more prepped for each scene.

Storyboard example:
A storyboard gives a sense of what the action will look like from the perspective of the camera once the sequence has been edited.  You'll notice various shot lengths, actions, and moves are all part of the plan.

Floor plan examples:


The floor plans give a birds eye view of the scene and emphasize the layout of set pieces, lighting, actors' blocking (movement), and the camera positioning and movement.

Another thing you might come across or use during a production is a more organized breakdown, and something called a call-sheet.  The breakdown in Celtx is nice, but the information is kind of buried, so usually someone will extract all of that information for each scene and use it to compile a schedule that also keeps track of all of the various on-set needs.  This includes props, actors, equipment, etc.

Here's a really solid example of a breakdown/schedule for a short student film:


Once the appropriate departments determine the shooting schedule, a call-sheet is distributed to cast and crew to let them know when they need to arrive and what needs to be prepared for each scene.  A call sheet looks something like this:


Different cast members and scenes have all been assigned numbers at this point, so they just show up when their number appears on the schedule.  Call sheets have a variety of different looks, but this gives you a general idea.  These are more essential for large shoots where the cast and crew become a lot to keep track of.  We don't particularly need one for today's exercise.

All of these things help in the preparation of an efficient, fun shoot.  Some productions utilize all of these tools, others pick and choose based on what the director and crew prefer.  For today's shoot, our floor plan is more or less mapped out and dictated by our classroom setting - we can add some camera choices to a floor plan or we can just decide each specific set up based on our shot-list and natural sense.  Let's get started.

This is also our first chance to take a look at Final Cut Pro (FCP).  Apple has just recently released an update to this highly popular professional software known as Final Cut X (FCX).  However, it hasn't been very embraced by the professional editing community because it was such a departure from other editing systems and didn't bring along a lot of the features people liked most.  So, until it's a more professional tool we'll be working with the last commonly used version (version 7).

When you open Final Cut, it looks something like this:
As you see, there are four main, separate windows, and two smaller windows.  Let's take a look at what each of these is for.  Currently in the top-left is the Browser window.  This is where your media files are organized.  Final cut can handle a variety of media.  Most of it is video - and Final Cut handles a lot of different video formats.  It also handles audio files, as well as image files such as JPEGS and Photoshop files.  When you import a file for use into Final Cut, it will place it into the browser window.


Various files in a final cut project appear in the browser.

From there you can organize your files further by renaming them, putting them into folders (called Bins) or color-coding them.  It's important to note, however, that when you use files in Final Cut you are only referencing them from where they exist on your computer/hard drive.  So any changes you make to a file inside of Final Cut won't actually change the file on your computer.  We'll talk about this more as we get further into Final Cut.

To bring footage into Final Cut from a camera, you have to use a tool called "Log and Capture..." (if it is a tape-based camera) or "Log and Transfer..." (if it is a file-based camera).  To do this, start by created a new project.  Go to File>New Project:

We'll have to make sure that our capture settings are correct by going to Final Cut Pro>Easy Set Up.  When you shoot your own projects, I can help you determine what settings to use depending on what type of format your camera shoots in.


We also have to choose a destination where we're going to save our work by going to Final Cut Pro>System Settings.  We'll talk about this more when you start doing your own projects.


Once we've set up our footage to save in the correct folder on our computer, and Final Cut knows what format to save it in, we're ready to capture our footage (our camera needs to be turned on, in playback mode, and connected via the proper cable)  To do this we go to "File>Log and Capture..." (or "Log and Transfer..." if you're using a file-based camera).


That opens the capture window.  Now we can control the camera from Final Cut look at our footage, and by clicking on Capture Now we'll start capturing the footage off of our tape.  Once we've captured the footage we want and close out of our capture process, the footage now appears in our BROWSER window as a file.

To look at a file, simply double click it in the browser.  You will see it appear in the VIEWER window:


One type of file that appears in the browser is what's called a sequence.  A sequence is where you actually build out your scenes, and eventually your entire movie - we'll come back to that.

Once you find a piece of footage that you like, you can then select a portion of it using IN and OUT markers.  Then you can add that clip to the TIMELINE which is the window on the bottom.  Once you add it, you'll notice that you can see a video track and any accompanying audio tracks.  To view and play back material in the timeline, simply use the spacebar or the play button in the CANVAS window, and watch the material in the CANVAS window.


You can then use your toolbar tools to do any number of things; Final Cut is a pretty powerful piece of software - you will eventually learn how to use the tools and other menus to adjust the image, monitor and manipulate audio, add effects and transitions, and all of the things beyond that will help you create a full piece.

All of that is for a later day - for now, just remember that the BROWSER window is to organize your footage, the VIEWER window is to look at and make changes to individual clips, the TIMELINE is where you build your sequence(s), and the CANVAS is where you monitor what's going on in your timeline sequence.  If you should need to access your sequence, just double click on the sequence file in your browser.  You can also work on individual sections of your movie at a time.  To do this, just create a sequence for each scene in a movie, and then copy and paste each of those into a larger, master sequence which is your whole movie.

For today's shoot, after we successfully shot our whole scene with all of the coverage we wanted, we captured the footage into Final Cut and then built out a simple sequence with all of the action edited the way we liked.  We then identified what sounds we wanted to add, and imported them from a sound library.  Some of them already existed in what we had recorded.  We then layered the tracks of sound with our edit, and this is what we came up with:

Here's what our timeline looked like in our Final Cut Pro sequence: