As we narrow in on our final project ideas, it's important to remember that as important as the technical skills we've learned are, nothing is more important than the meaning, emotion, and intention behind your choices as an artist.
We've discussed these ideas a lot - especially in the context of the story ideas and how we shoot those ideas. Of equal importance is the way we move through our choices in the edit. The edit is where the choices we've made all along become real - and the edit has the power to really improve the story, or to ruin it completely.
The editor's job is to use the words and images that have been created previously and use the cuts to convey the emotional impact that the director has been seeking all along. In pre-production there is a very specific relationship between the writer and then the director. In production, the DP works to help realize the director's vision as it pertains to shots, movement, and lighting. And in post, it is the job of the editor to make everything work in harmony to actually sew it all into something tangible. Before the editor there is literally just a pile of choices - after the edit there is a movie.
Let's look at some scenes from 'The Cutting Edge' and discuss:
Think as well about how this influences documentary. Let's look at some BAVC student work that emphasizes the edit choice.
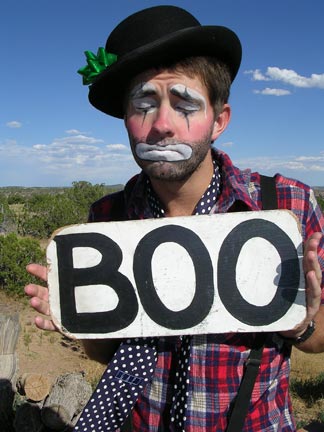
Think about the role not only of the image but of sound. Some of the worst documentaries are too focused on talking heads footage - yet sometimes cutting to the person who is speaking is the most effective choice. Think about the power of the edit as you look at work and also as you plan your own.
Speaking of planning your own! We have a TON of wonderful project ideas that came out of last week's brainstorm, but we have to select what we can actually pull off. So, here's where we've landed:
At this point, we've dipped into each of the main areas of filmmaking. We've talked about taking an initial idea and using various tools to develop that into a story, and if it's a narrative, write a script. We've talked about the process of planning through organizing your equipment and people, your visual ideas: shot lists and storyboards, and if you're working in documentary spending time with your subject and finding the most compelling angles.
We've overviewed the basics of production, from camera operation to sound and lighting. You should know how to plan and execute shots, thinking consciously about what effect different angles, focus, and movement will have on your final product. We've talked sound capture and sound design, as well as lighting technique and set up.
And we've dipped into editing in Final Cut. Taking that footage and ingesting it into the computer, labeling, organizing, and laying down a cut. And most importantly you all have been exemplary in your exploration of conscious storytelling and critical thinking about portrayals of subject/character, story, and the ways in which all of these technical tools influence a viewers experience.
Now it's time to put all of this into action. Spend today brainstorming things that are important to you, stories that are interesting, and considering what is realistic as a first project. Remember, we're keeping things pretty short (5-7 min) and we'll be moving pretty quickly. I'm not expecting an epic feature film, in fact, I'm not even considering that. Rather, see what you can do simply that will be even more powerful.
Some ideas:
1). Prepare a pitch for a project that tells a story very personal to you. This could be a biographical kind of story about your own life or the life of someone close to you.
2). Prepare a pitch for a project that tells a story important to your community. This could be an issue you care about, an organization you respect, or an individual who's life you admire.
3). Prepare a pitch for something that pushes back against mainstream media tactics. This could be a fake-commercial that mocks advertising techniques, or a short PSA that addresses issues you think are relevant (portrayals of women/girls, violence, etc.)
As we shift our focus towards final project for the class, one thing that will be a very important tool in your filmmaking arsenal is a solid understanding of how to conduct and shoot an interview. Many of you could incorporate personal stories in this or future projects, and there are a lot of different techniques that can get you the footage and narrative you need.
Some of this might be second nature to you, and some of it is a little tricky to remember. We've all seen countless examples of interviews in the media we've grown up with. Sometimes it's very direct, like a talking head on a screen, and other times it's embedded within a more complex set of visuals. Pay attention to interviews you think are effective, which ones do you trust? Which ones are you skeptical of? What is the style of the interview contributing emotionally to the story?
I want to take a look at a video that's blown up and stirred a lot of controversy in the past week or so. It's a documentary of sorts - but it's also an amazing demonstration of social media, and some very interesting techniques that are specific to our current time and place:
The Kony 2012 Video has a ton to discuss. My main questions for you are: Do you trust the filmmaker? Why or why not? What techniques are being used here? What do you want to do next, after watching this piece?
Discussion about this is a great jumping off point for the rest of our day, and moving forward thinking about your projects for the class.
Now, let's break it down in terms of thinking about it in your own work. Like everything else in your project, the key to a great interview starts long before the camera is actually rolling, and doesn't end until you've locked in your edit. Every step along the way contributes to the quality and message your interview will ultimately have on your viewing audience.
During the process of pre-production, or whatever time you have prior to your interview there are a few key things you need to determine for yourself.
The first is obvious, and comes with any project - what is my topic? And more specifically, what is my focus? With documentary each of these will be subject to change, but you need to have something compelling to go on.
It's always ideal to spend some time with your subjects and your topic without a camera. If you're doing a piece about the circus, ideally you get to hang out at the circus a bit without a camera and get to know the characters, the stories, the sights and sounds. As you do this, you'll find that something more specific starts to develop - rather than being just about the circus, perhaps it's about the treatment of the animals, the history of the freak show, the traveling lifestyle, one specific clown -- there's about a million different movies within that topic.
As you start researching and spending time with your topic, you'll probably find that your focus narrows.
As these ideas form, start thinking about your interview subjects - who is the most interesting and compelling? Who can do the most to help you tell your story? Who has an interesting perspective or anecdote? Don't choose the most charismatic person if they have nothing to add to your piece.
Start thinking about your own role as a filmmaker and interviewer? How are you going to let the audience know that they can trust you? What is your involvement in the piece itself? Are you going to let them know why you're interested in this subject -- or are you going to keep your presence behind the camera? These are all very important questions to answer.
Someone like Michael Moore embeds himself within his work
Or Morgan Spurlock, who is the filmmaker and the subject.
Ken Burns doesn't appear at all in his work, and his influence is in the stylistic choices of the camera and edit.
As you start to lock down some of these bigger choices, and deciding who your interview subjects will be and what your own role as a filmmaker/interviewer is, it's a great idea to conduct pre-interviews. These are broad overviews of the subject matter that give both you and the interviewee the opportunity to prepare for the on-camera interview. You can do this in-person, over the phone, even through e mail. These questions may or may not be used in the actual interview, but most importantly they serve as a way to get some basic stuff out of the way early, and prepare both you and the subject for your respective interview styles. You can also use their answers to inform further questions that you'll use in the interview.
Now that you're ready to conduct the interview on camera, there are a few things to consider.
If you're the director as well as the interviewer, you have a lot to keep track of. Decide early on some of these factors so that you can keep yourself focused on the interview itself:
The Environment: Think about what the best environment for your interview is? Do you want it to be something formal, like a studio? Do you want to put it in context (i.e. backstage at the circus?)? Where will your subject be most likely to give you the content you're after?
(Also consider the effect the environment will have on your sound!)
Framing: Is the interviewee going to be looking at you, or right at the camera? Are you going to be seen at all? Why?
Sound: What kind of microphone are you using? Lavalieres are often smart for interviews, but they can be a little more set up and carry issues of their own.
Providing basic comforts: How can you keep your subject comfortable? Consider where they are, have water on hand, and if necessary make sure you've provided proper food. Think about your lights and microphones, and the placement of additional equipment and the camera -- it can add up to be kind of intimidating, so how can you best set up for your subject and interview?
Once you're all set up and ready to conduct the interview itself, here are some important tips to remember:
It's okay to give explanations and directions:
It can be a great idea to give your subject an idea of how you're going to proceed. Let them know if you might interrupt them, or move subject areas. It's perfectly acceptable to ask a subject to repeat something they've said, or to re-word it in a shorter sentence, etc.
Have them put the question in the answer - especially if you are going to cut out the interviewer.
Make sure your subject knows to repeat your question in their answer. For example, if you say "what is your name?" they should say, "My name is Beth" rather than just, "Beth."
Finding your genuine self/empathy:
Be real. Be relaxed - you need to be the one in control during the interview. The best way to do this is to let your subject know that you care about what they're saying. Even if they're moving off topic, be polite in re-guiding them. If you anticipate navigating into difficult topics, be ready to respond accordingly.
Structure your interview:
As you think about the order of your questions, it's usually a good idea to start with the easy stuff and progress to more in-depth things. Start with the super basics, then maybe move on to things you've covered in the pre-interview. Then start moving in new directions and ask any tough questions. Think about starting with factual material and then moving on to anything subjective.
Phrase your questions to avoid yes/no or simple answers.
Don't put too much in the question if you want the subject to give you a genuine answer. Rather than "Was that difficult for you?" say "How did that make you feel." etc.
Be ready to blend between planned and spontaneous questions:
You should always come in with a strong list of planned questions. But don't be so rigid that you don't follow promising answers with important follow up questions - if something seems relevant to your topic, ask more about it. Similarly, don't just wander down every tangent your subject may go on, use your planned questions to get things back on track where you want them.
So far we've covered a lot of really important elements of filmmaking, from idea through execution and even piecing the product together in editing. You should feel comfortable with the basic flow of taking a concept for a movie and making it a reality through planning, shooting, and cutting it.
However, there is one area that we haven't really gotten hands-on with, an area that will drastically improve the quality and value of your work in cinema - and which will allow you to use your camera to it's fullest potential as well as add a whole new creative level that can shape your story.
That area is lighting.
Just by the nature of the work, you've already dealt with lighting in one way or another. A lot of you commented on the quality of lighting in your footage during the scavenger hunts, particularly in stuff that you shot outdoors. The sun is our most natural and greatest light source - and it is a huge asset to our filmmaking ability. However, there are a number of other tools that can work to create amazing lighting effects and set ups as well -- including ones that help you take more control over how you use the natural light available to you.
The big concepts: Cameras are not nearly as nimble or sophisticated as our own eyes and brains. As a result, if we want to create a look for our movie that looks appropriate to our eyes, we have to do a little extra work. The difference between a well-lit scene and an unlit scene can look something like this:
And that's just using a single additional light! When you really start to use a few lights and think about the way they blend together you can achieve control with amazing results.
There are a number of factors that affect the light intensity, shape, color, and the effects it creates. This has to do with what you have available in your set of lighting tools. Let's take a look at some common options:
Type of light:
The type of light you use will affect how powerful it is and how the light is cast in terms of shape and color. For video, you have a number of different options.
Practical lights - these are lights that appear within your scene. Usually these are things like table lamps. You can also think of them as the things you have available to you for use in instances where you don't have access to a professional lighting kit. Things like lamps, globe-light/chinese lanterns, and any built in lights can go a long ways towards boosting your image.
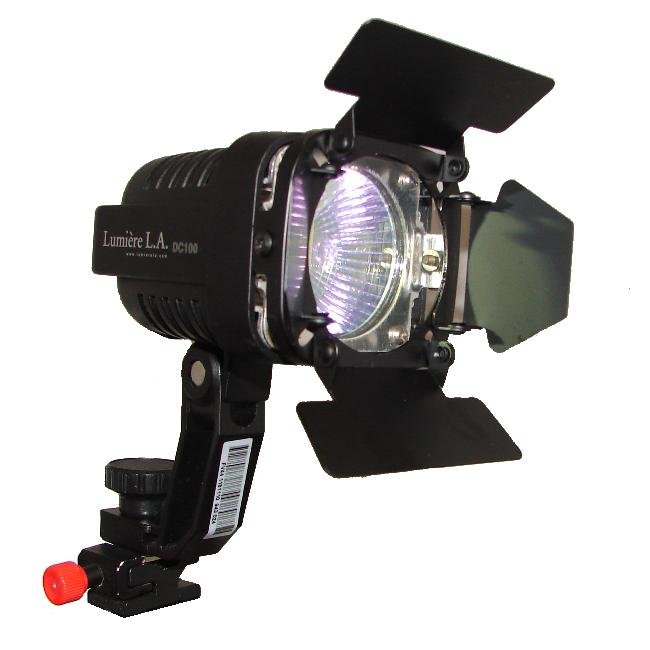
Tungsten video lights: There are a lot of different types of lights that are designed specifically for use with video and/or film. There are two main types of color temperatures in video: tungsten and daylight. Tungsten is at a specific color temperature that casts more of an orange-yellow light, similar to what you might find in indoor lighting with regular household bulbs.
These video lights can output quite a bit of light, and in some cases can be quite harsh. Depending on the type of bulbs they can also get very hot, and you have to be pretty careful about how you handle them.
Daylight video lights: Some video lights are daylight balanced. We don't perceive it easily with our eyes, but the color temperature of natural daylight is significantly more blue than a lot of light that comes from the bulbs we use. As a result, special daylight-balanced film lights have been created for use in film and video. When you use these they match with the light being cast by the sun - so they're great for use outdoors. You can also use them to create the appearance of daylight - such as light coming through a window on a set where there is actually no exterior light.
If you have access to a tungsten light, but need to create a daylight effect you can put a blue gel in front of the light. Similarly, if you have a daylight balanced light and need a tungsten color effect, you can use an orange gel. Gels are transparent pieces of thin plastic that can handle high temperature exposure, and are used all the time in creative lighting:
Lighting gels and the effect they can have
The shape of your light can be affected by a number of different factors. Some lights are very harsh, and others are quite soft. Softer lights are nice for creating a more even spread of light and more harsh lights can be very effective in creating dramatic and highly contrasted looks. If you have a naturally soft light, you can try to shape it into something more directed for dramatic effect, and if you have a naturally harsh light you can try to soften it up.
Below are some common light types for film video. These are professional and semi-professional lights, but please bare in mind that any light help to will provide you with the opportunity to illuminate your scene and be creative with what you want:
Incandescent lighting - this is the same concept as used in a household bulb - but in film/video lights the bulbs are usually much much more powerful and create a mush more intense light cast. Depending on the type of bulb, these can be relatively energy efficient or require a decent amount of power.
HMI lighting - Usually, these are also capable of very strong output. They can also run pretty hot to the touch and can heat up a set.
Fluorescent lights - florescent lights like those used in offices can cast a very even, soft light. However, they are not ideal for use in film because they tend to appear with a flicker and cast a sort of green color.
Kino Flo lights - this is a light very similar to traditional fluorescents, but are made to be used in video. They resolve a lot of the issues that traditional fluorescents have, run quite cool and are relatively energy efficient. They are also available as daylight balanced.
LED lights - LED is a newer technology that is being used more and more for film/video. They are very energy efficient, they are quite soft and even in their cast, and are usually pretty light and easy to set up. Some of them have color issues where they appear sort of green, but high quality ones are available in daylight, tungsten, or adjustable color temperatures.
Lighting set ups:
There are a lot of different ways to think about setting up your lights for a given scene depending on the style and set up of your location. But for a good general starting place, the fundamental lighting set up to know and learn is called 3-point-lighting. Using this concept you will be able to create a dynamic scene that emphasizes your subject and lights them evenly without being distracting.
This concept requires three different lights. The Key Light, the Fill Light, and the Back Light. Let's look a little closer at each and what purpose it serves.
The Key Light is just the term for whatever light you use to first emphasize your subject. Usually you want to use a light that can really push on one side of their face in a pretty targeted way - it's the brightest in the set up. A good place to first set up the key light is at about a 45 degree angle from where you have your camera.
The Fill Light is placed somewhere around mirror image of the key light. The fill is usually softer and less intense than the key, and serves to balance the shadows being cast by the key.
The Back/Rim/Hair Light is placed behind the subject, pointed at them. It serves to illuminate the hair and maybe the subject's shoulder from behind, essentially providing the scene with depth and pushing the subject off of the background.
Here's an idea of how each light serves the scene:
You can be creative with exactly how you achieve these effects, but that is the idea behind 3-point lighting -- the most important thing to think about is what you're trying to achieve in your scene and how you might use different light sources to achieve context and emotion. Do you want your lighting to look very natural? More dramatic? Colorful?
Remember, even to make lighting appear natural on film/video takes a lot of work - you can just use what's there because cameras are not as dynamic as our eyes. We have to help them achieve the illusion of a natural appearance.
Here's a great example of how lighting can be an important character in your scene:
Once we reviewed these concepts in class, the students went to work creating some set ups of their own. We had a traditional HMI 3-light-kit that used tungsten halogen bulbs, we had an LED light kit that was daylight balanced, and we also had the whole light grid in BAVC's MPR which is mostly outfitted with daylight balanced Kino-Flo fixtures.
Here's some stills off of the monitor that shows what you came up with:
Before the video lights are on - using only what's in the room AKA work-lights
The Key Light only
Full 3-point-lighting set up using our tungsten kit
A softer look using the light grid (Kino-Flo lights) and LED lighting
The set up for the above look
Using high-key lighting to try and create a noir-style look in black and white